Last week I bought some paper that was so cute I wanted to see it all the time. So I made a winter wall hanging. I did a winter one so it will match my other holiday items and it can be up after x-mas.
Here is how I made it. First I jotted down a rough sketch of my idea and assembled any products I might want to use.
Then I used mycutsearch.com to see which cartridges various images were on. I used Accent Essentials, Create a Critter, George and Basic Shapes, Plaintin Schoolbook and Sesame Street Friends cartridges on my Circut to cut out the different shapes. For the presents, I didn't like the all the 'ribbon' so I cut off the bottom part.
After that I decided which colors I wanted to use in the open spaces on the snowmen.
I used some scraps from other shapes to fill the empty spots.
Next I added some bling and other accents.
After all the pieces were made and dry, I moved them around until I like the layout.
Once I knew how wide the 9 parts were going to be, I prepared the top banner. I used 3 different fonts, and 2 techniques.
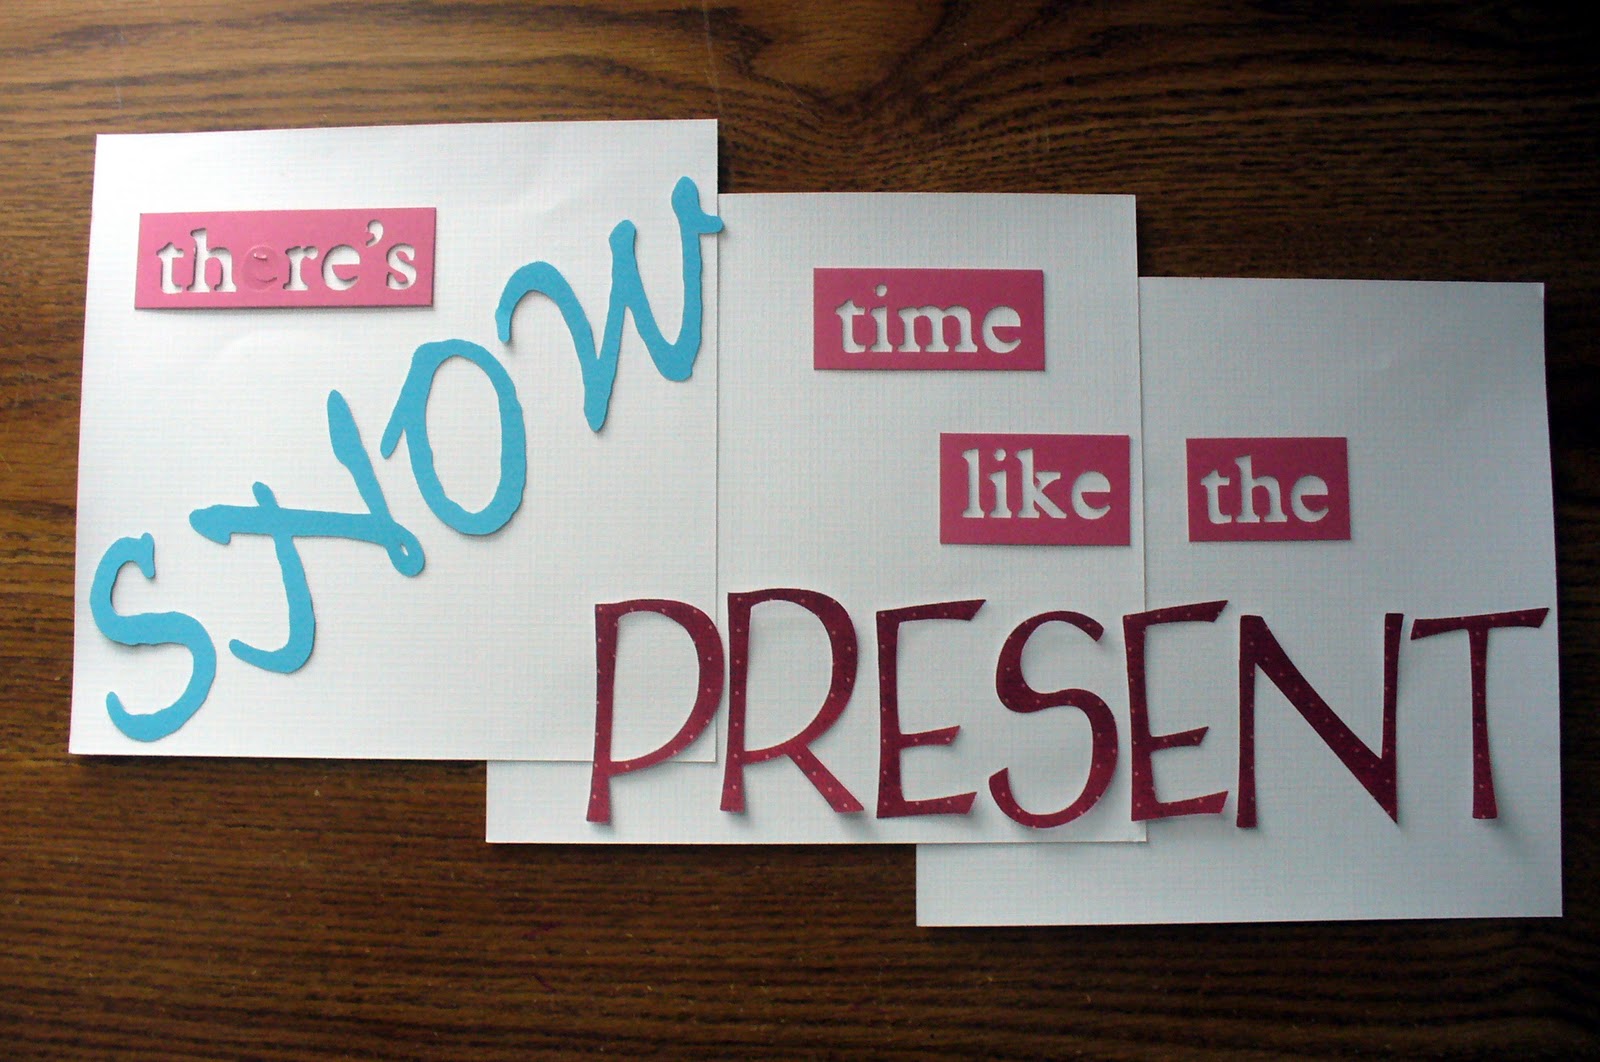
For all the e's, I used Glue Stic to temporarily hold the center in place while dabbing the ink.
To help hold the main ribbon, I pushed it through a small hole with a brad. I then folded the brad over the ribbon and used hot glue to hold everything firmly in place. (note: You may need to add chipboard or other firmer material to the back of the banner to keep it from warping while it's hung.)
Let everything dry and wha-la! An awesome winter wall hanging!
Tuesday, November 22, 2011
Saturday, November 12, 2011
Pumpkin Carving
This was the first year our boys got to help carve the pumpkins.
On the left is all the in-action shots of us creating with the pumpkins. I dabbed a little black ink on the paper to dull it down a little, added a few stickers and Paprika Stickes on every picture mat.
The right I made the same face I carved into the pumpkins. The orange texture is from the ink pad. Both triangles were cut out with the Cricut and i free-handed the smile. Everything is outlined with Black Diamond Stickles.
On the left is all the in-action shots of us creating with the pumpkins. I dabbed a little black ink on the paper to dull it down a little, added a few stickers and Paprika Stickes on every picture mat.
The right I made the same face I carved into the pumpkins. The orange texture is from the ink pad. Both triangles were cut out with the Cricut and i free-handed the smile. Everything is outlined with Black Diamond Stickles.
Sunday, November 6, 2011
More layouts
I finished a few layouts at a crop last month and I finally got a chance to post them. Here they are:
This one is a 'time capsule' style layout with everything we did to this point in 2011.
This is one of me and the boys cheering for our favorite football team.
The next layout is for our favorite get away.
My boys had a great time helping me peel apples before we put them in the crockpot.
While we were peeling apples, the boys both started eating them!
One boy got hurt and needed ice (looks like Nemo) and the other wanted the same thing.
The boys were learning fire safety so I made them each 'fire' with my Circut. They got to wear their fire hats and used Legos as a hose to put out the fire. Then I got to scrap it.
This one is a 'time capsule' style layout with everything we did to this point in 2011.
This is one of me and the boys cheering for our favorite football team.
The next layout is for our favorite get away.
My boys had a great time helping me peel apples before we put them in the crockpot.
While we were peeling apples, the boys both started eating them!
One boy got hurt and needed ice (looks like Nemo) and the other wanted the same thing.
The boys were learning fire safety so I made them each 'fire' with my Circut. They got to wear their fire hats and used Legos as a hose to put out the fire. Then I got to scrap it.
Labels:
Alphas,
Cricut,
DCWV,
Fancy Pants,
Imaginisce,
Ink,
Layouts,
Paper Studio,
Punches,
Ribbon,
Stickers
Friday, November 4, 2011
Pajamas
There are so many things I want to scrap right now that I have a hard time picking. Yesterday I had a few minutes and made this.
And yes, it's true. The only reason I took this picture and made the layout was so I could use my Imaginisce 'Happy Camper' kit.
Labels:
Imaginisce,
Ink,
Layouts,
Stickers
Thursday, November 3, 2011
Anniversary
It's been such a busy month and I feel like I've been making anything other than a traditional layout. I finished this last week, right before our 5th Anniversary.
It's a mini book celebrating us.
These pages show us right after we got engaged and the photo I used on our wedding invitation.
Here you see us on our wedding day and at the Alamo on our honeymoon.
This has 2 recent pictures, one of us and one of our family. I wanted to show how we've grown over the years.
The back cover shows the dates.
This sits on our entertainment center as decor and for people to see it. Our 2 boys say 'anniversary' whenever someone looks at it.
It's a mini book celebrating us.
These pages show us right after we got engaged and the photo I used on our wedding invitation.
Here you see us on our wedding day and at the Alamo on our honeymoon.
This has 2 recent pictures, one of us and one of our family. I wanted to show how we've grown over the years.
The back cover shows the dates.
This sits on our entertainment center as decor and for people to see it. Our 2 boys say 'anniversary' whenever someone looks at it.
Labels:
Brads,
DCWV,
Ink,
Journaling,
Other Projects,
Stickers,
Stickles
Subscribe to:
Posts (Atom)


